There are many types of beginnings: the first day of school, losing your first tooth, meeting your best friend, or your first time to the library! But sometimes a normal day can also be a beginning. Pick up a Take & Make Kit at the Ashland Library and mark your beginning. Inspired by Jacqueline Woodson’s children’s book The Day You Begin, each kit contains supplies to create your very own time capsule. Embellish it with glittery paper, dyed coffee filters, ribbon, or pictures from magazines (visit your nearby Library branch and see if they have any old magazines you can have). Add small treasures that remind you of who you are: a special rock, a photograph, the name of your favorite book. It’s all good! Put it away for a year, and see what surprises it may hold. Kits are available while supplies last.
If you can’t make it to Ashland to pick up a kit, these are some of the materials you can use to make create the time capsule at home:
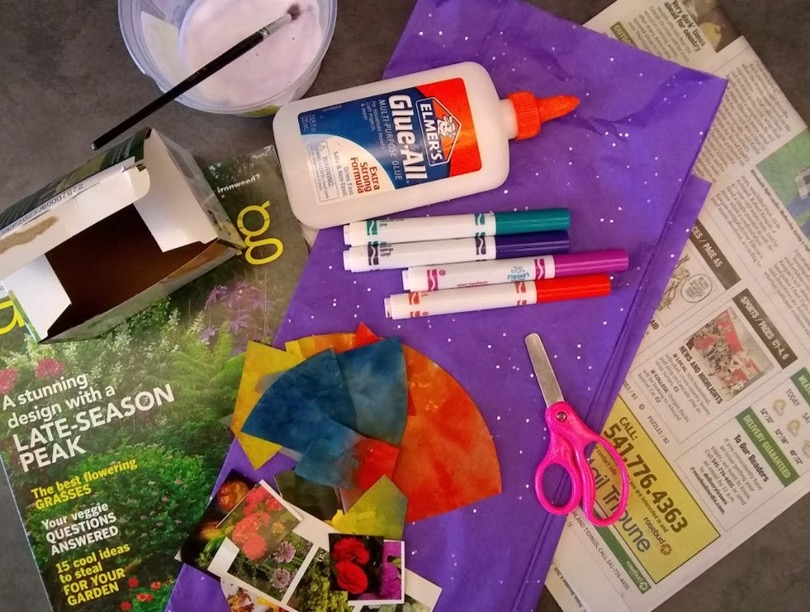
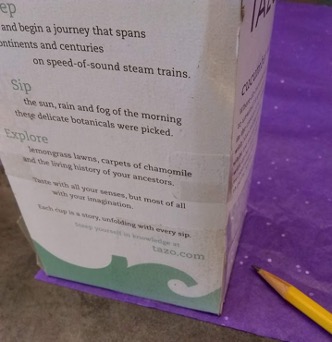
As you can see in the picture, there’s a lot of stuff, but that’s all a personal choice, and just an example of things you can use to create your capsule. The only absolutely essential thing is some kind of small box or container. I choose to use a tea box, since my family drinks a lot of tea and they are always on hand. (Shh, don’t tell anyone, but I dumped the tea bags in a Ziploc, and took the box before it was completely empty!)
Here’s a list of other helpful items for this project:
- Watered-down glue: about 1/8 tsp. water to 1 tsp. of glue
- A container to hold the glue
- Washable Markers
- Paint brush, sponge, or Q-tip
- Things to decorate the outside of your box: tissue paper, newsprint, pictures from magazines, ribbon, dyed coffee filters, etc. (A dollar store is great place to get some of these supplies.)
Once you gathered all you need, you’re ready to create your time capsule.
1. The first thing I did was beautify the inside of the box:
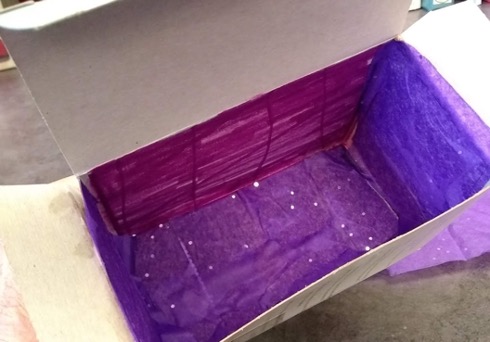
I used a combination of marker and tissue paper. The best way to get the tissue paper to fit is to use the outside of the box as a template. I measured out a separate piece for the bottom, and both of the smaller sides.
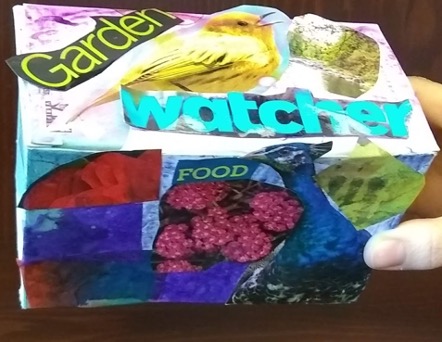
2. Now it’s time to get started on the outside, but before you do that, take some time to think about it a bit. I enjoy gardening, bird watching, and being in nature, so I made sure I had some pictures and words that reflected that. Look through your stash of stuff and make a plan for what might go where. On the other hand, you might just want the outside of the box to look fun, and plan on the all the important stuff going on the inside. That’s a great way to go as well.
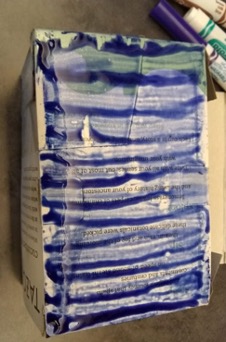
3. Once I had myself organized and knew what I wanted to decorate my box with, I was ready to get started. I used a marker to cover the entire side of one panel of the box and then brushed a covering of glue on top of that.
4. Before the glue dries too much, place the bits and pieces you have ready on the wet glue. I did this for each side of the box until… ta da! The box was done!
While the box is drying, this is the time to decide what you want in your time capsule. Remember you don’t get to open it for a whole year, so think about the things that are important to you and what you might want to remember about the past year and who you are. Here’s a list of ideas to get you started:
a. Write down some things you’d like to see happen in the next year.
b. What are your hopes and dreams? For instance, is there a personal goal for that you would really like to accomplish?
c. Put in a few little treasures (like I mentioned above, a special rock, sea shell, feather, a picture of a place you visited, a picture of yourself, etc.
The fact is, this time capsule is about you and what you care about, so make it uniquely your own. Just remember that no matter what goes inside your time capsule, it’s what’s inside you that’s most important–and what’s inside you is fantastic and fabulous!
For a sweet story about fostering positive thoughts and beautiful ideas, take a look at the storytime short featuring the book We Believe in You by Beth Ferry. For more Rogue Reads activities and programs visit https://jcls.org/roguereads, and don’t forget to reserve your seat for a live, virtual author talk with Jacqueline Woodson on Sunday, February 21, 2021 at 4:00 p.m.