Back when my children were quite young and we were living in New Hampshire, I really looked forward to warm and sunny summer days, especially after a long New Hampshire winter. Still, every once in a while, there were days when the heat and humidity were just crushing. It was on days like that that I often found myself racking my brain for something that would help cool us all down, but also be fun and engaging.
One idea that proved to be a great success was the time we created little ice boats to float in the kiddie pool. All you need is room in the freezer, some plastic containers to fill with water, and a straw or stick for a mast. I also added a few embellishments to spark my kids’ imaginations and turn it into a high seas adventure. Just be aware that this is a two-day project, but well worth it in the end. If this sounds good to you, here is a step-by-step guide to help you get started.
1. To begin, gather your supplies:
• Food storage containers (smooth sided containers work best) that hold no more than two cups of water.
• Pipe cleaners, straws, sticks, anything you have around the house that can be useful as a small mast.
• Rubber bands
• Paper of some kind to create a sail
• Pencil
• Scissors
• Food coloring (optional)
• Water
• A pool, tub, or large container to float the boats in.
Feel free to use your own creativity to enhance the project even more.
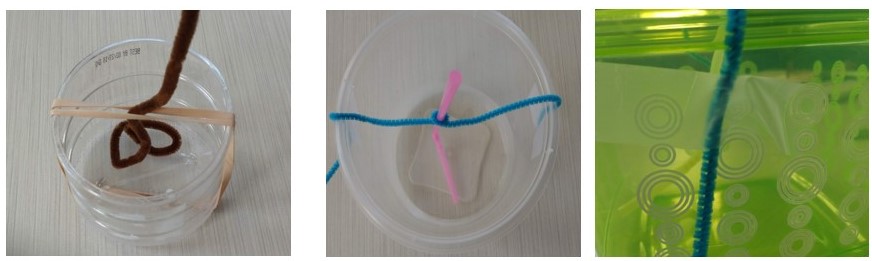
2. Once your supplies are gathered, take whatever you are using for a mast and secure it inside the container. This can be a bit tricky, but rubber bands work really well, as does a pipe cleaner and a little tape
3. Next fill your containers with water, and add the food coloring if you want. (I mostly used it this time so that my boats showed up better in the pictures.) If you don’t have food coloring, the project is still going to be lots of fun without it. Just a reminder—if you use food coloring, it can leave a stain.
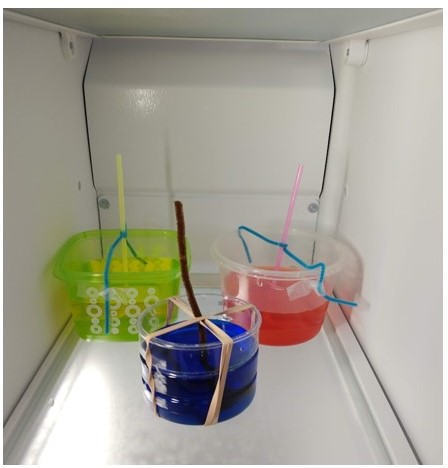
4. Now it is time to place your containers in the freezer and wait at least 8 hours for the ice to freeze solid.
5. While you wait for the water to freeze, you can do what I did and visit your local library to check out books on boats, sailing adventures, pirate stories, etc. Here are a couple of lists of similar books you can find in our own collection.
Children & Junior: Pirates Summer Reading 2022
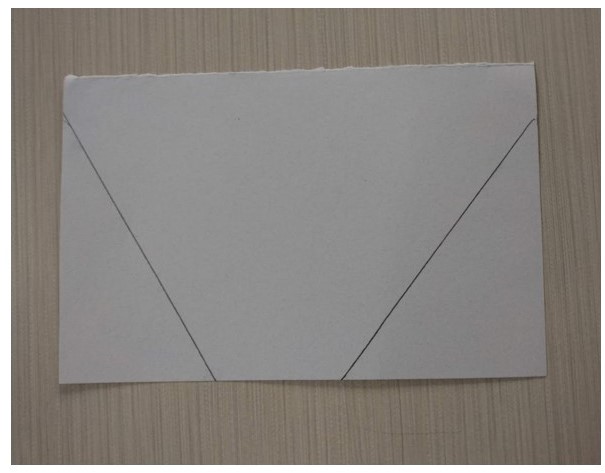
6. This is also a good time to create the sails for your boat. Take some paper and draw a triangle with one side longer than the other.
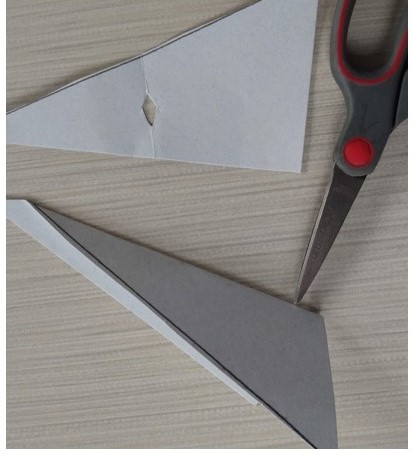
7. Fold the triangle in half and snip a small slit across. This is how you will attach it to the mast.
8. When it’s finally time to take your boats out of the freezer, wait a bit, and fill your tub or pool with water first.
9. Once your tub is full, pop your boats out of their containers, attach the sail to the mast and you and your child are ready to launch your little fleet of ice boats!
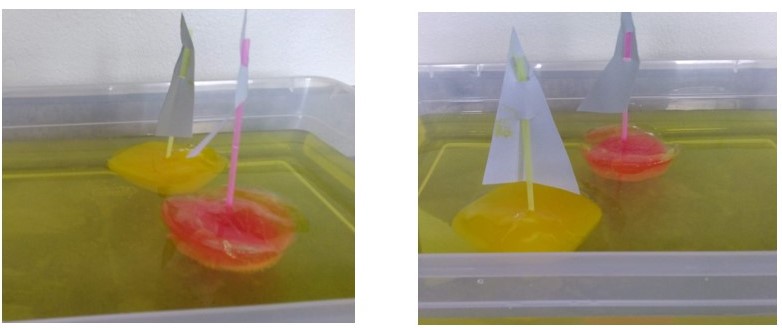
There are so many ways to enhance this simple project: collect some rocks to add to the tub to create islands or throw in a stick or two to create little obstacles they need to navigate around. If you have floating toys like a shark or fish, those would be fun too. For me and my kids, this was such a fantastic way to while away a hot summer day, and one of those memorable moments of parenting when a simple project turned out to be such a wonderful success.
There are lots of ways to beat the heat at the library this summer. Check out our event calendar for a cool program near you!