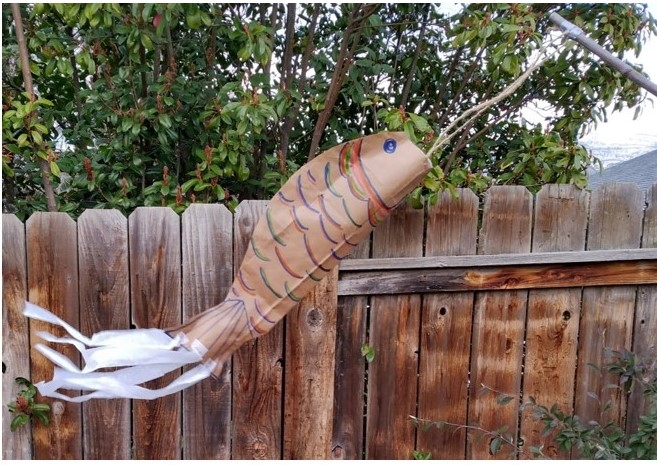
Spring is here and what better way to enjoy the balmy breezes than to fly a kite? Several branches in the Library District will be offering a make your own kite program. Inspired by the Japanese koinobori design, participants will be able to create a kite that represents their vision and sense of fun. Check out the event calendar for dates and times at a branch near you.
If you are interested in finding out more information on koinobori, here is one of the many sites you can visit. If you can’t make it to your local branch, this is also a fun and simple craft you can make at home with a few basic materials.
Here’s what I used to make my own fish kite:
• A cardboard tube (toilet paper or paper towel tubes are perfect for this)
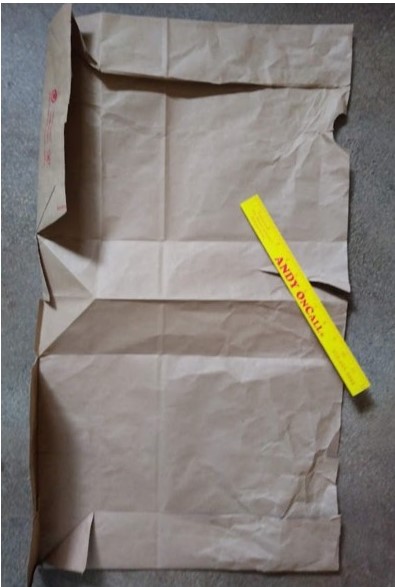
• A regular paper bag from any store
• Pencil
• Ruler
• Scissors
• Glue or stapler
• Tape
• Markers or crayons
• String
• Ribbon, crepe paper streamers, or tissue paper cut in strips
After I had all my supplies gathered, I was ready to get started.
Here are the steps I took:
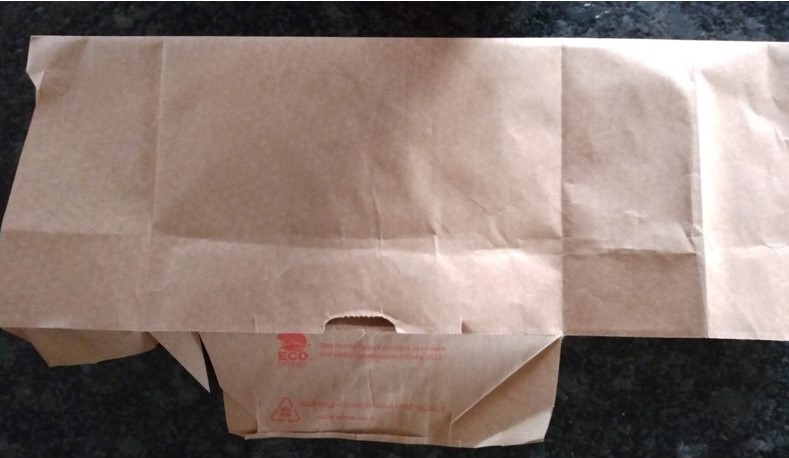
1. The first thing I did was cut open the paper bag (you can also use old wrapping paper, newspaper, or butcher paper).
2. Fold your bag in half so that it is 6 to 8 inches wide.
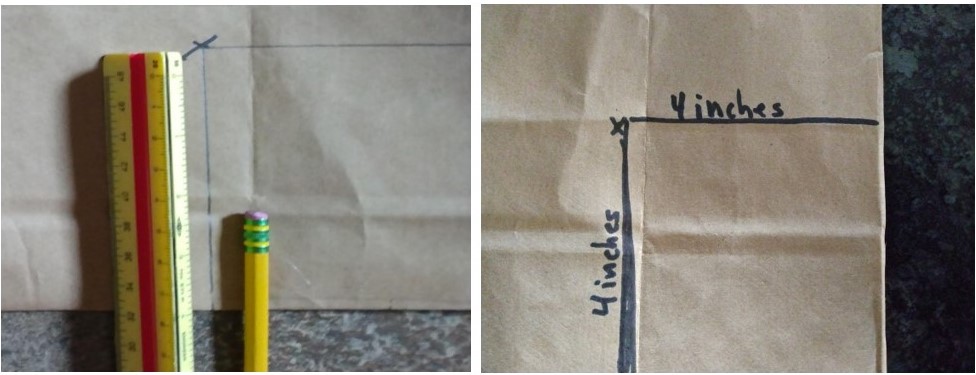
3. Using my ruler, I made sure that the fish’s mouth was at least four inches wide, and I marked it with a small x.
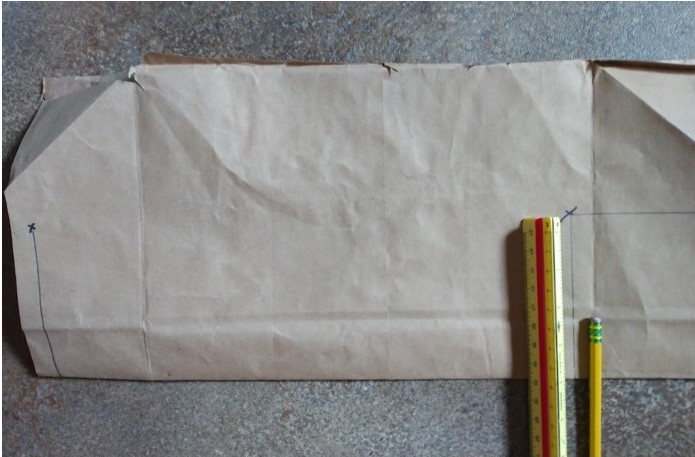
4. For the fish’s tail, at the opposite end from the mouth, I measured about four inches up and then four inches across to the end of the paper so I had something that looked like a square in the corner. I put a small x where the two measurements met.
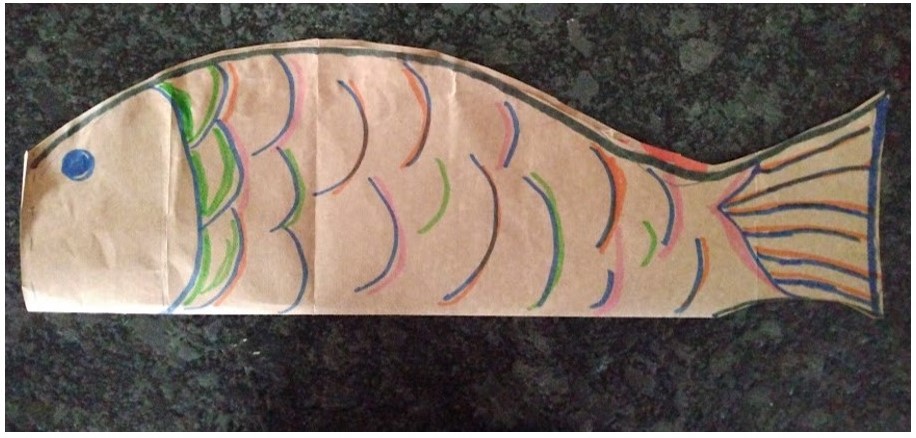
5. When I had my measurements down, I drew one half of a fish shape, imagining that its belly was on the fold of my paper.
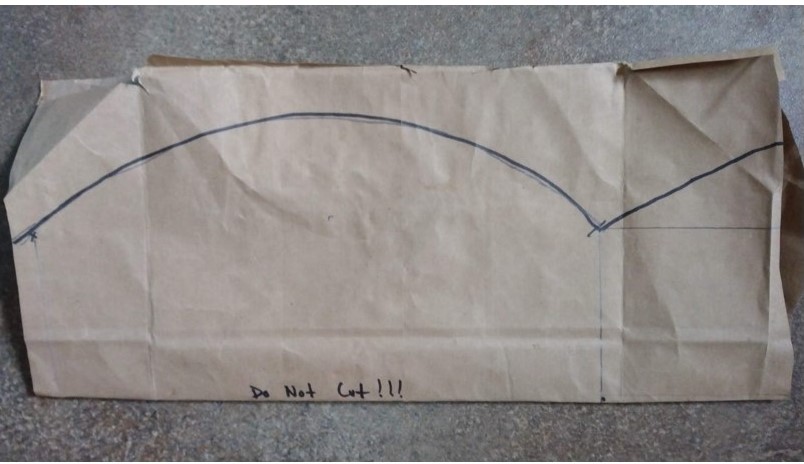
6. Once you have your fish drawn, and staying away from the fish’s belly, cut out the outline of the rest of your fish and open it up. I recommend using another x at the mouth and at the tail, this will remind you and your child not to glue that part of the fish
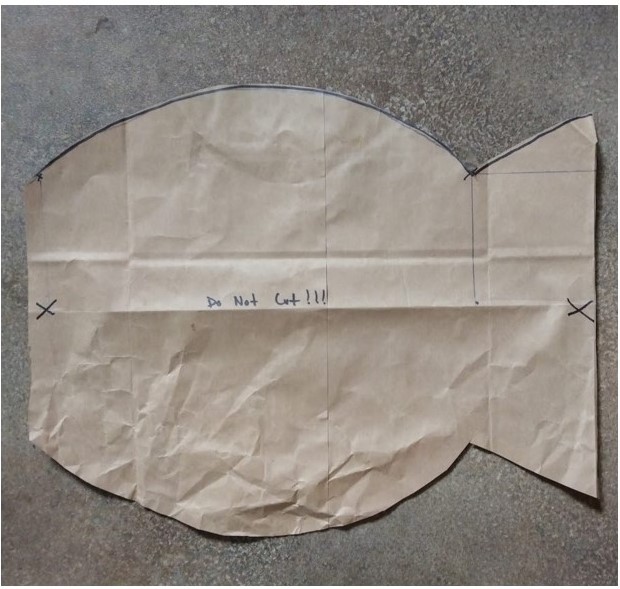
7. If there is writing on your paper bag, make sure this is the side that is facing you, as this will be the inside of your fish that no one will see.
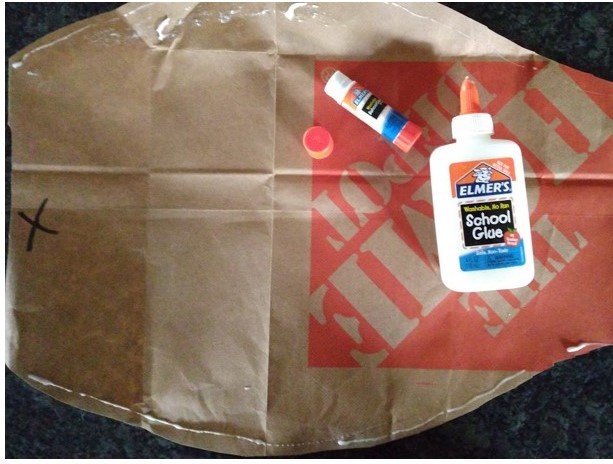
8. Once you have glued or stapled your fish together, it’s time to decorate it. I used regular washable markers on mine; crayons or paint are also good options.
9. When your fish is decorated, it’s time to get out the paper tubes. If you are using a paper towel tube, cut it to about four inches in length. Glue one end of it and carefully slide the unglued end into the mouth of your fish.
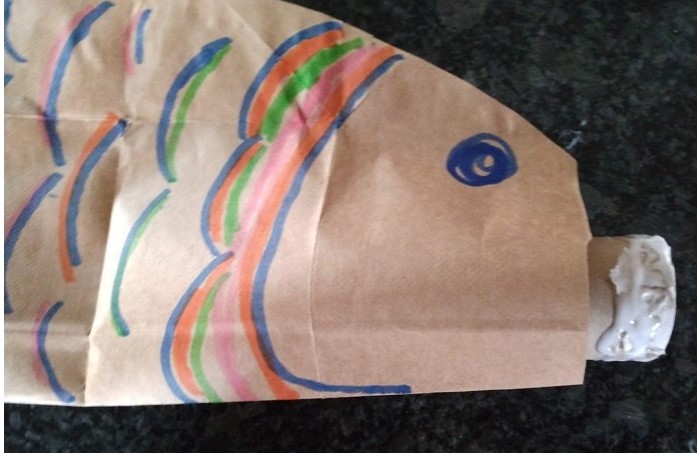
10. Making sure not to flatten the tube, pinch the paper mouth of the fish and the tube together.

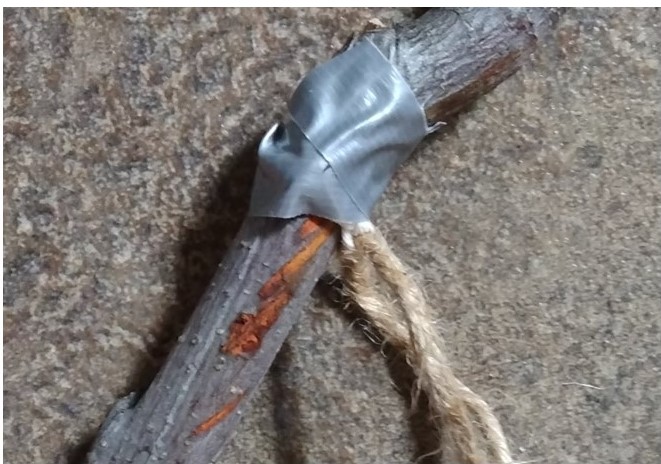
11. Cut a piece of yarn or string about 18 inches long and carefully attach it to the mouth of the fish. A hole punch would be most effective, but I didn’t have one of those at home, so I just stapled my string to the inside of the mouth and secured it with some tape.
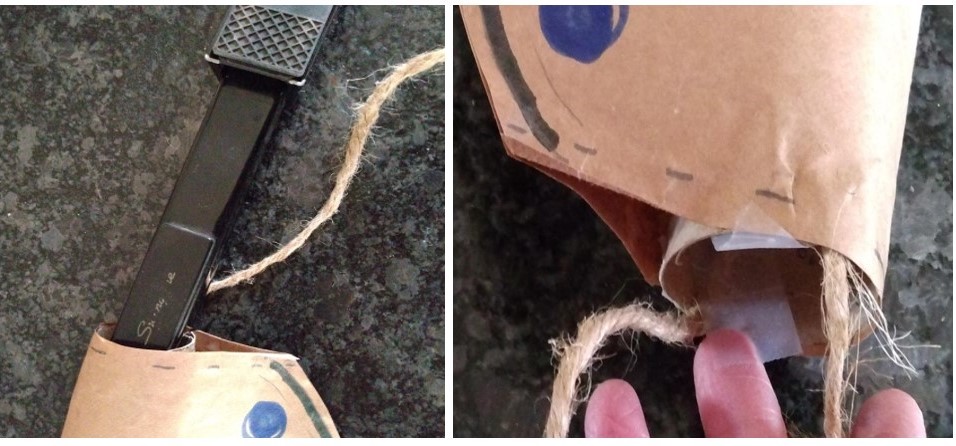
12. Next, if you want, you can do what I did and attach the fish to a stick or dowel. Using a branch I found in my backyard, I cut an extra piece of string to help me attach the fish to the stick.
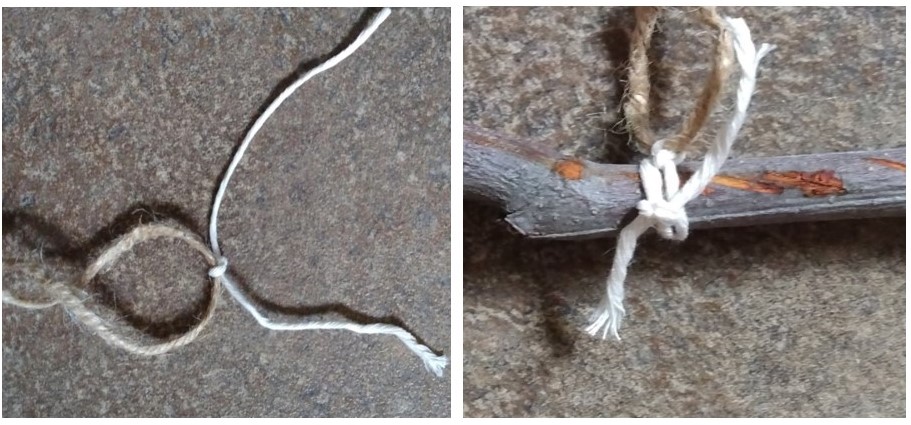
13. I then reinforced it with some duct tape.
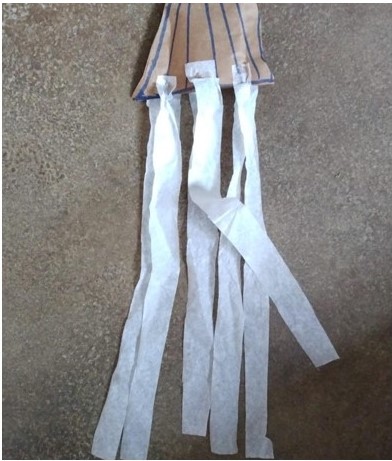
14. Now it’s time for the finishing touch. I took some tissue paper, cut it into strips, and attached it to the tail of my fish. (You can also use paper streamers or ribbon.)
15. Hang your fish outside where it will catch the breeze, or pull it behind you and let it fly!